How To Check Margins In Word Mac
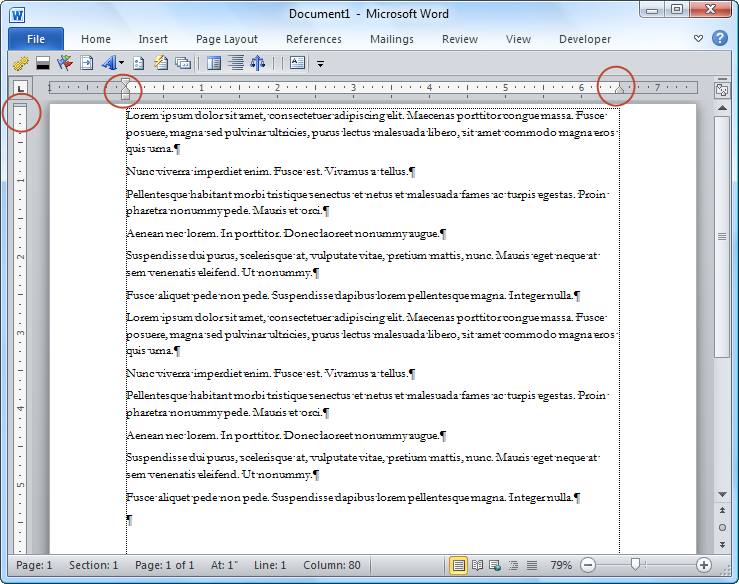
Then in the Margins group click on the Margin button. To adjust the top or bottom margins hover your cursor over the inner border of the gray area of the vertical ruler until your cursor becomes a double arrow.
Ms Word 2011 For Mac Change The Page Margins
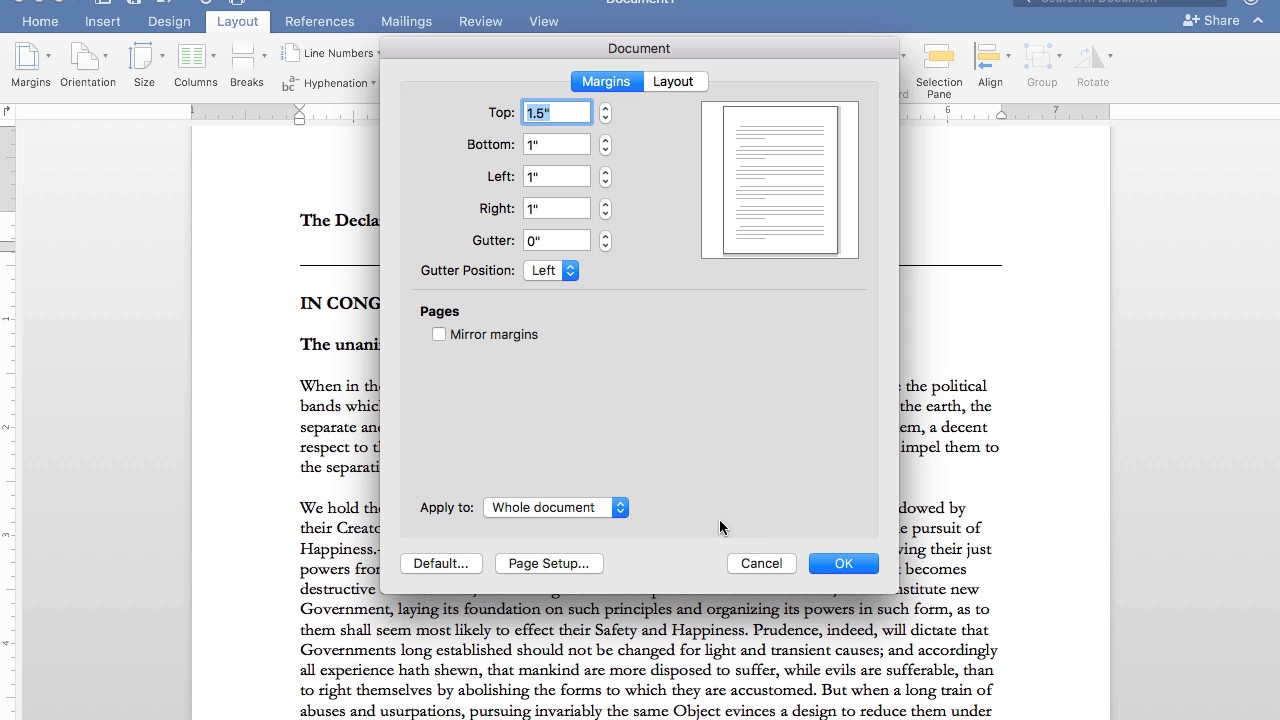
The box includes three tabs namely margins layout and paper.
How to check margins in word mac. Apply a predefined margin setting. 4- Choose the Show crop marks box. Click in the toolbar then click the Document tab at the top of the sidebar.
Select the Show vertical ruler in Print Layout view under Display. In the Document Margins section click the arrows or enter values in the fields next to Top Bottom Left and Right. This video demonstrates how to set the margins in a document using Word 2016 for Mac.
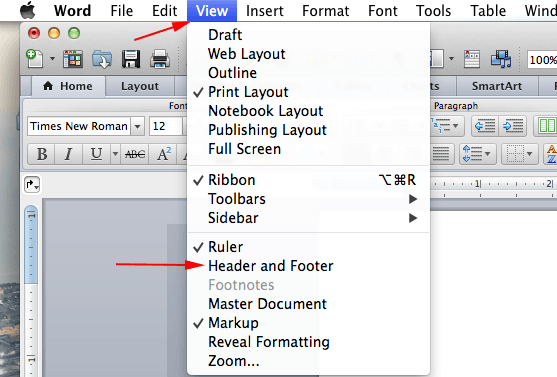
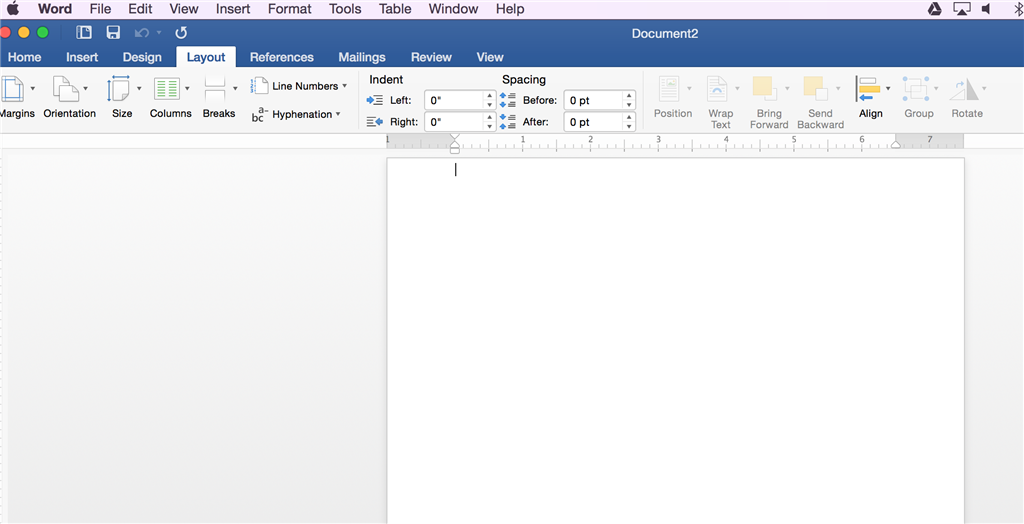
Select Layout Margins. Enter Microsoft Word in the Spotlight search to open the Word application. Go to View and select Ruler.
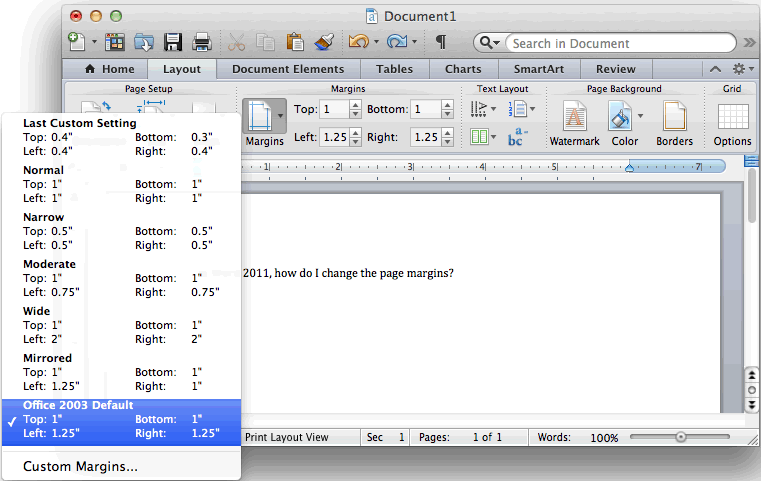
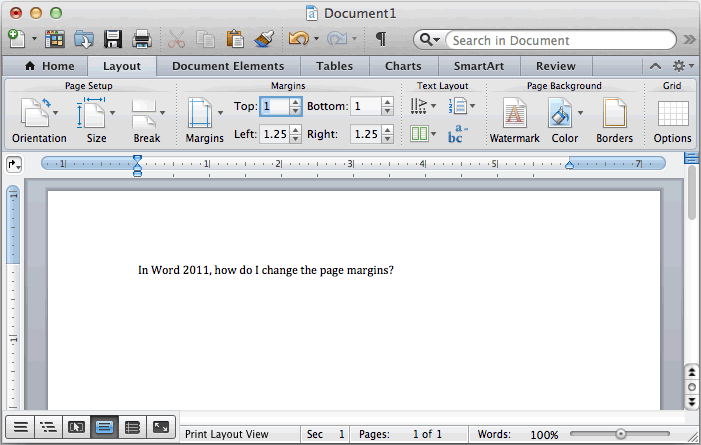
Change margins in your document to change the layout and make sure everything fits. To get a list of options for margin settings click the Margins button. Choose the margins tab to.
Selecting on of the preset margin options. Type new values for the Top Bottom Right and Left margins. Either double-click the top or bottom edge of a page or go to Word Preferences View to restore the check for White space between pages in Print Layout View.
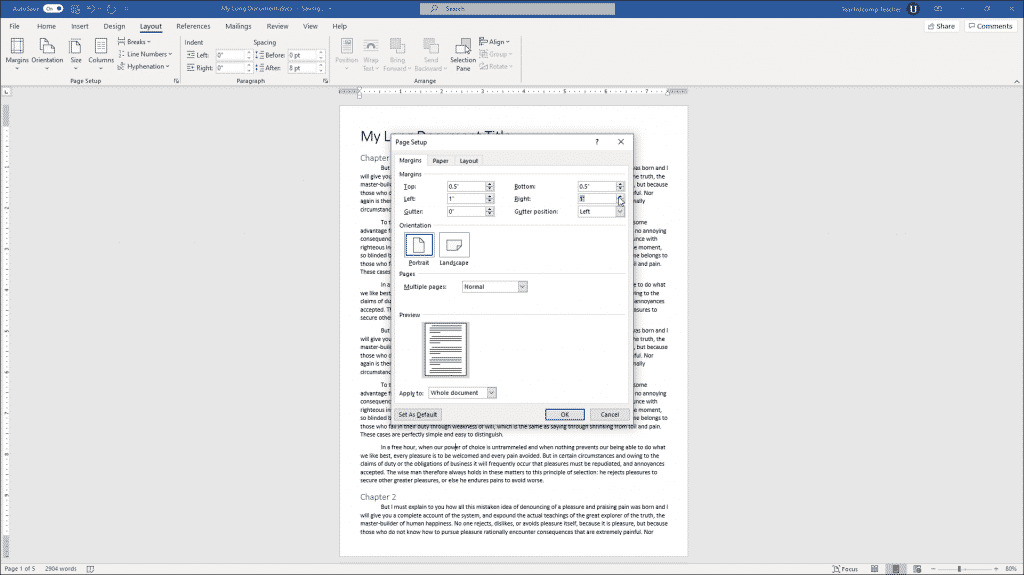
Go to Layout tab. Going to Layout Page Setup on the main ribbon. This will open a popup menu where you can select one of the preset margins or Custom Margins.
Word 2007 and later. Click Selected sections after selecting a block of text in the document in order to apply the. Clicking Margins and then either.
Horizontal ruler Cursor enlarged to show detail Slide the double-arrow cursor to the left or right to adjust the margin. If you want to see the margin of your word document on your screen you have two ways. Go to Layout tab.
It has nothing to do with margins. Create a new document. Select the Layout tab in the toolbar at the top of the screen.
Set document margins for a word-processing document. Open the Spotlight search from the menu bar. Click on the Format menu on the top menu bar.
To show the vertical ruler Go to File Options Advanced. Replied on September 21 2020. Click on Margins at the menu bar.
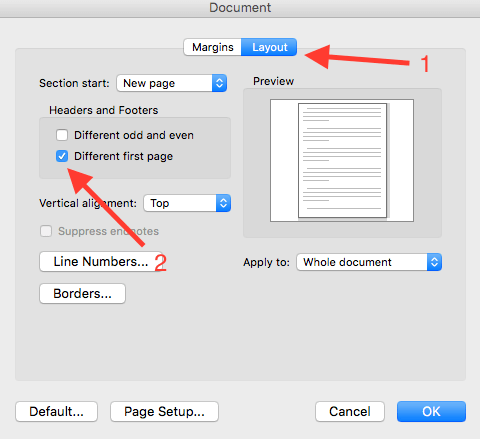
Select the margin measurements you want. Select the section in the document where you want a different margin size. Click This point forward if youd like the new margins to apply to the pages of the document beyond the cursors current.
How to Show Crop Mark on Your Screen. Once you locate the guide option make sure you check the box in order to enable it. Select the Custom Margins post at the bottom of the file to open the page setup dialogue box.
In todays video we will show you how to set 1 inch margins in Word for macOSOpen the file you need. For margins of less than 1 inch adjust the document margins in the Document sidebar see Set document margins for a word-processing document. It will be close to the Ruler option in the View tab.
Clicking Custom Margins to open the Page Setup menu and setting the size of the top bottom left and right margins as required. Click Whole document if youd like the same margins used throughout the document. 2- Click on the Option key.
How to Change margins in word for Mac. To change the margins for a single section. If the text is in a text box table or shape first click the Text tab at the top of the sidebar then click the Layout button.
1- Click on the File. Click on the View button in the Menu Bar on top as indicated by 1 in the image above Next look for the Guide option. Youve accidentally toggled off the display of what Microsoft refers to as white space between pages.
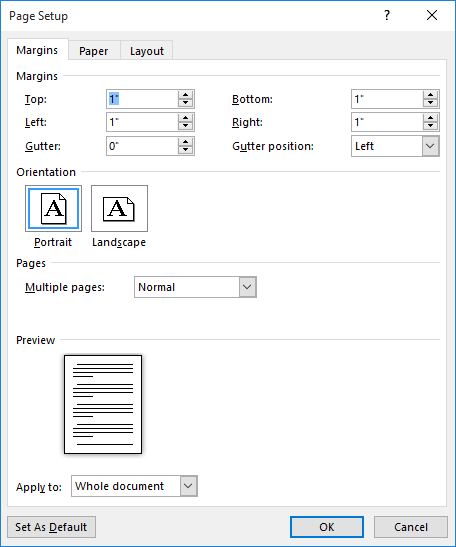
Page Layout tab Margins Custom Margins Set all margins to 0. Select the Document option from the Format menu as. If your document contains multiple sections the new margins apply only to the selected sections.
3- On the left panel choose Advanced. Select Layout Margins Custom Margins. The first way is showing crop on your screen.
Now you can see the crop mark on the screen.
Ms Word 2011 For Mac Change The Page Margins
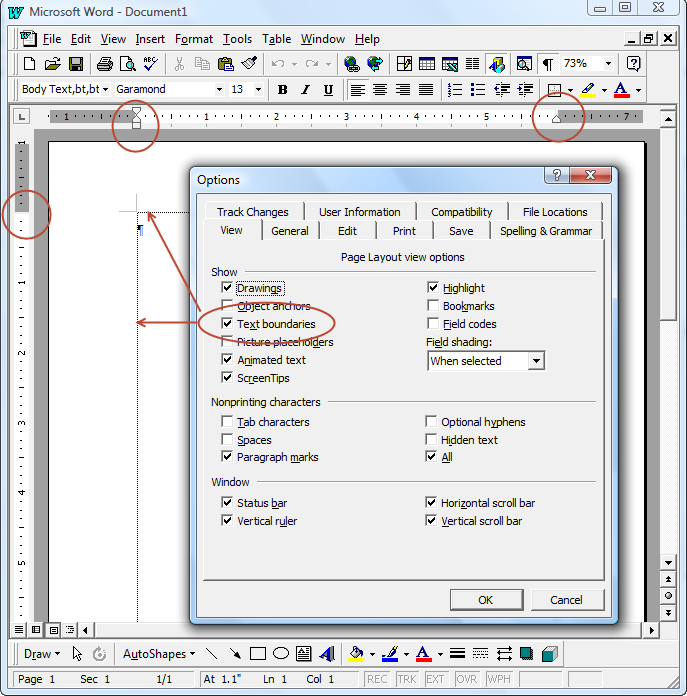
Text Boundaries Display In Microsoft Word

How To Set 1 Inch Margins In Word 2011 Solve Your Tech
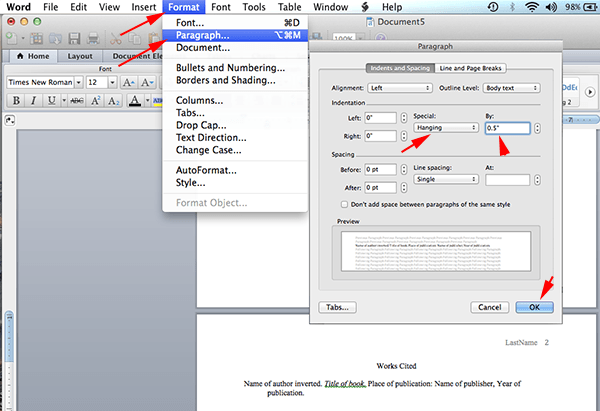
Mla Format Microsoft Word 2011 Mac Os X Mla Format
Word 2016 Header Footer Not Showing On Blank Document Microsoft Community

How To Set 1 Inch Margins In Word 2011 Solve Your Tech
Setting Margins In Word 2016 For Mac Youtube

Mac Users Landscape Pages In Word For Mac 2016 Only Youtube
Text Boundaries Display In Microsoft Word

Change Margins In Word Office Watch

How To Set 1 Inch Margins In Word 2011 Solve Your Tech
Mirrored Margins In Ms Word M M Blog

Mla Format Microsoft Word 2011 Mac Os X Mla Format
How To Setup Mla Formatting On A Mac Using Word 2011 User Theory Llc Marshall Nc Web Graphic Design Web Accessibility And Social Media Management Company

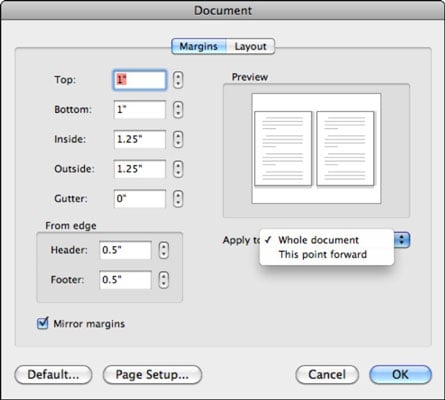
How To Set Margins In Word 2011 For Mac Dummies
Decreasing Space Between Body Text And Footer Text Microsoft Word

How To Set 1 Inch Margins In Word 2011 Solve Your Tech
How To Insert And Save Cover Page In Microsoft Word On Mac
Set Margins In Word Instructions Teachucomp Inc